Table of Contents
This documentation provides a step-by-step guide on setting up and managing paid bookings using the Easy Booked Plugin in combination with WooCommerce.
1. Requirements #
- WordPress installed on your site.
- Easy Booked Plugin installed and activated.
- WooCommerce Plugin installed and activated.
2. Setting Up Paid Bookings #
2.1 Installing WooCommerce #
- Go to the WordPress Dashboard.
- Navigate to Plugins > Add New.
- Search for WooCommerce, install, and activate it.
2.2 Configuring Easy Booked for Paid Bookings #
- Navigate to WordPress Dashboard > Easy Booked > Calendar Manage.
- Click on Edit next to your desired calendar.
- Under the General tab, select the Appointment type as “Paid”.
- Click Save Changes.
Once saved, options for selecting WooCommerce products will appear.
3. Editing Time Slots #
3.1 Accessing Time Slots #
- In the same calendar management area, you will find the option to manage time slots.
3.2 Adding and Editing Time Slots #
- Here, you can add new time slots or modify existing ones to correspond with your services.
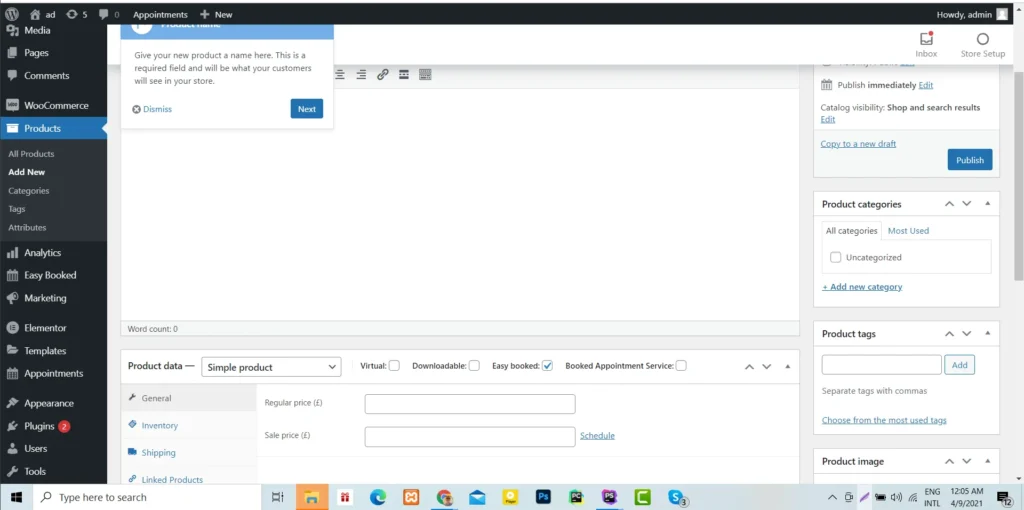
4. Creating WooCommerce Products for Easy Booked #
4.1 Adding a New Product #
- Go to WordPress Dashboard > Products > Add New.
- Fill out the product details such as name, description, and price.
4.2 Important Product Settings #
- Ensure that you check the “Easy Booked” checkbox when creating the product; otherwise, it won’t sync with the Easy Booked Plugin.
5. Conclusion #
Following these steps will enable you to effectively set up paid bookings through the Easy Booked Plugin and WooCommerce on your WordPress site.
6. Images #
Image 1: Calendar Management Page
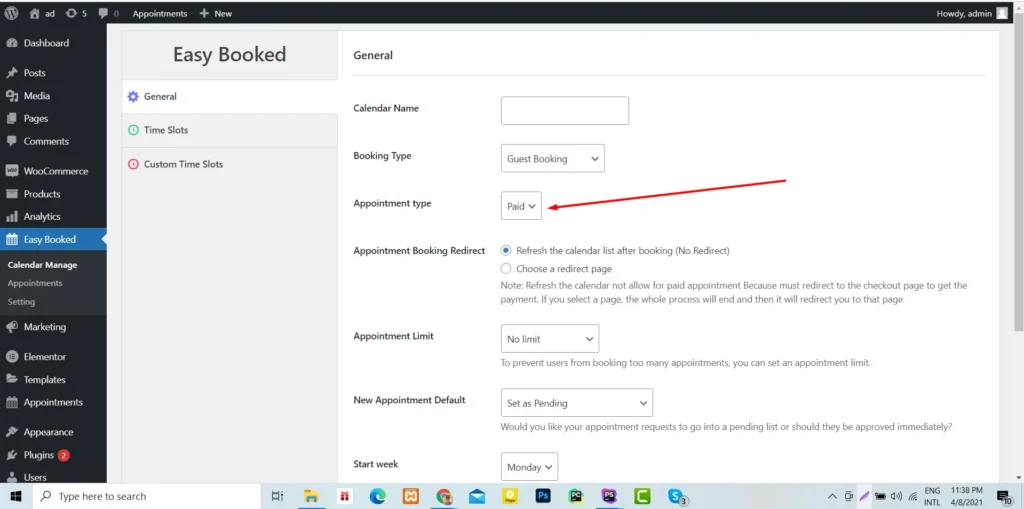
Image 2: Editing Time Slots

Image 3: WooCommerce Product Creation