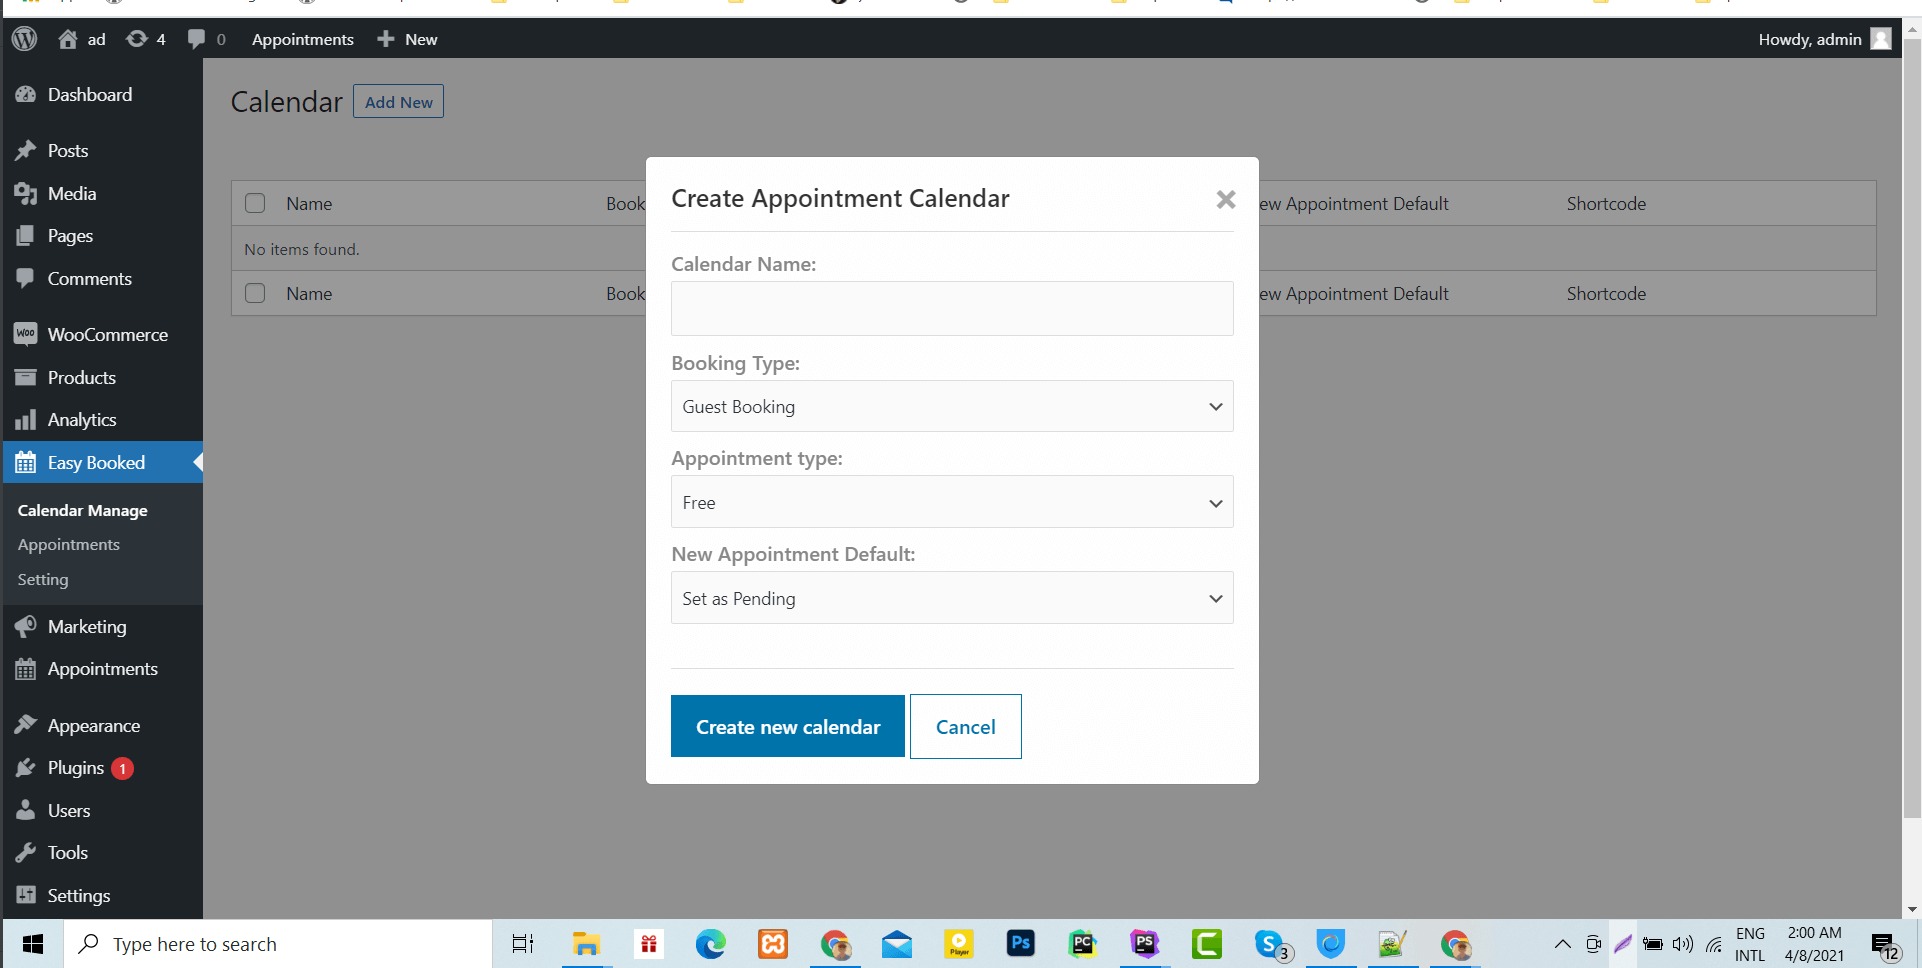
To create calendars, you need to click “Add New”
Page Location: WordPress Dashboard -> Easy Booked -> Calendar Manage
Then such a popup will come.
Enter a name, then fill in the rest of the information and click the “create new calendar” button.
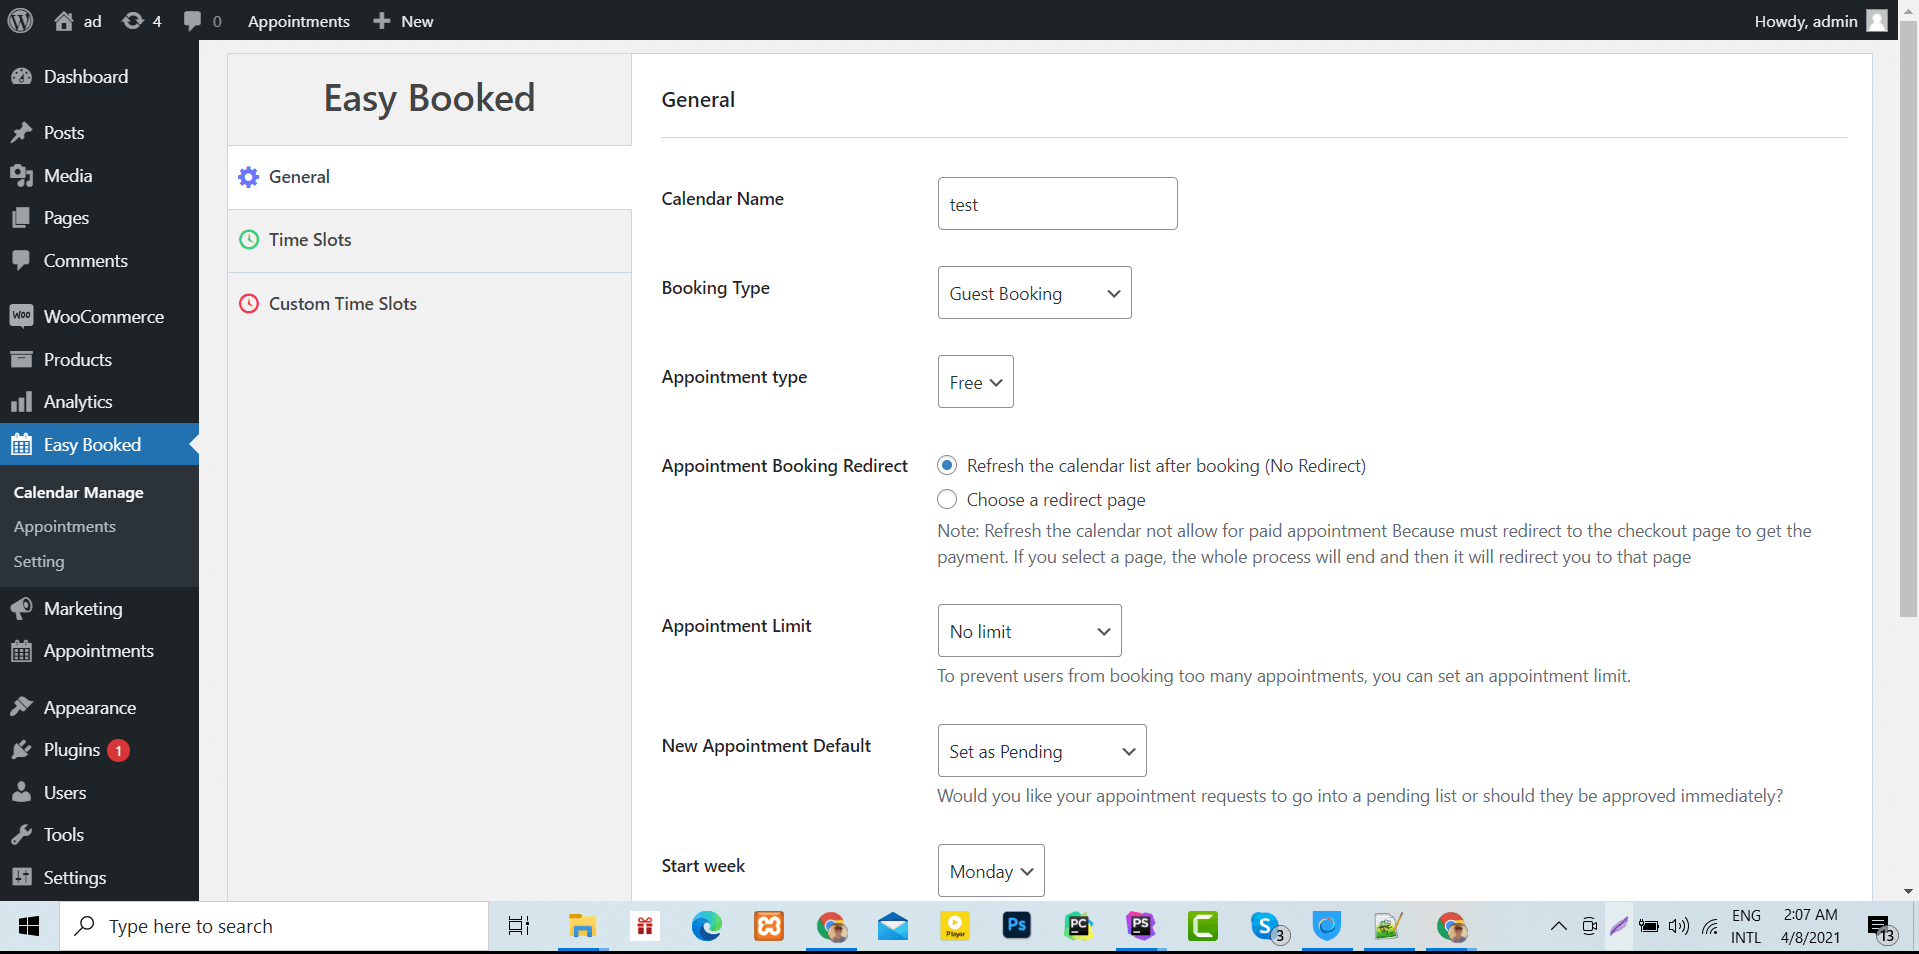
When you click “Create new calendar” it will redirect you to a new page
Once you have your calendars created, you can go calendar Settings page and create time slots and Custom Time Slots for each calendar. There is a general setting that allows you to configure the basic setting of the calendar
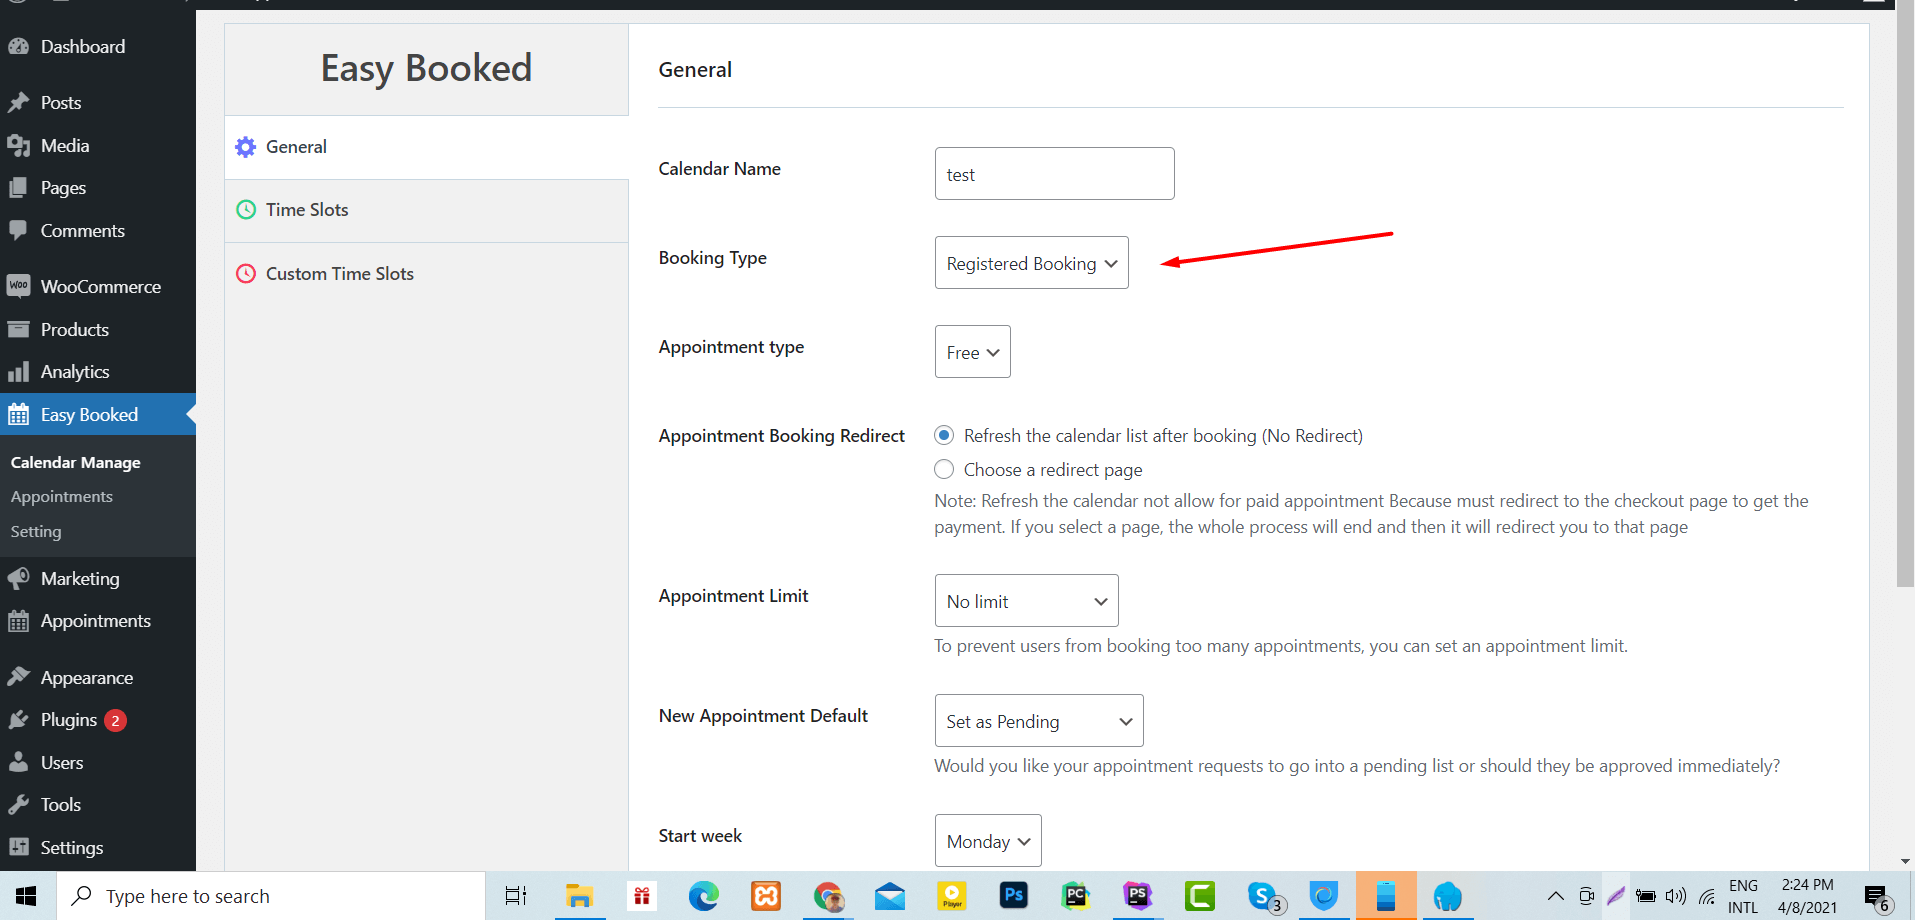
_If you want any user can’t book Appointments without registration Then you have to select “Registered Booking” from the “Booking Type” option, and then you have to configure the other setting according to your needs_
In the next section, we will discuss how to create time Slots
If you want to see all your calendar lists, click on “Calendar Manage”
In this page, you will see all the calendars and you can edit or delete them if you want.


